


Based between Edinburgh and the small Hebridean island of Iona, bookbinder Rachel Hazell draws inspiration from shorelines, the beauty of paper, the familiarity of a well-thumbed story and the excitement of cities. After reading English Literature at Edinburgh University, Rachel trained in Bookbinding at London College of Printing and completed a Master's Degree in Book Art at Camberwell College of Art.
Her workshops and courses today centre around the power of imagination, creating books that resemble unique artworks. As part of our Time to Make series, Rachel talks us through the process of making bespoke wrapping paper using just a few simple materials, and the rhythm and repetition of looping letters.
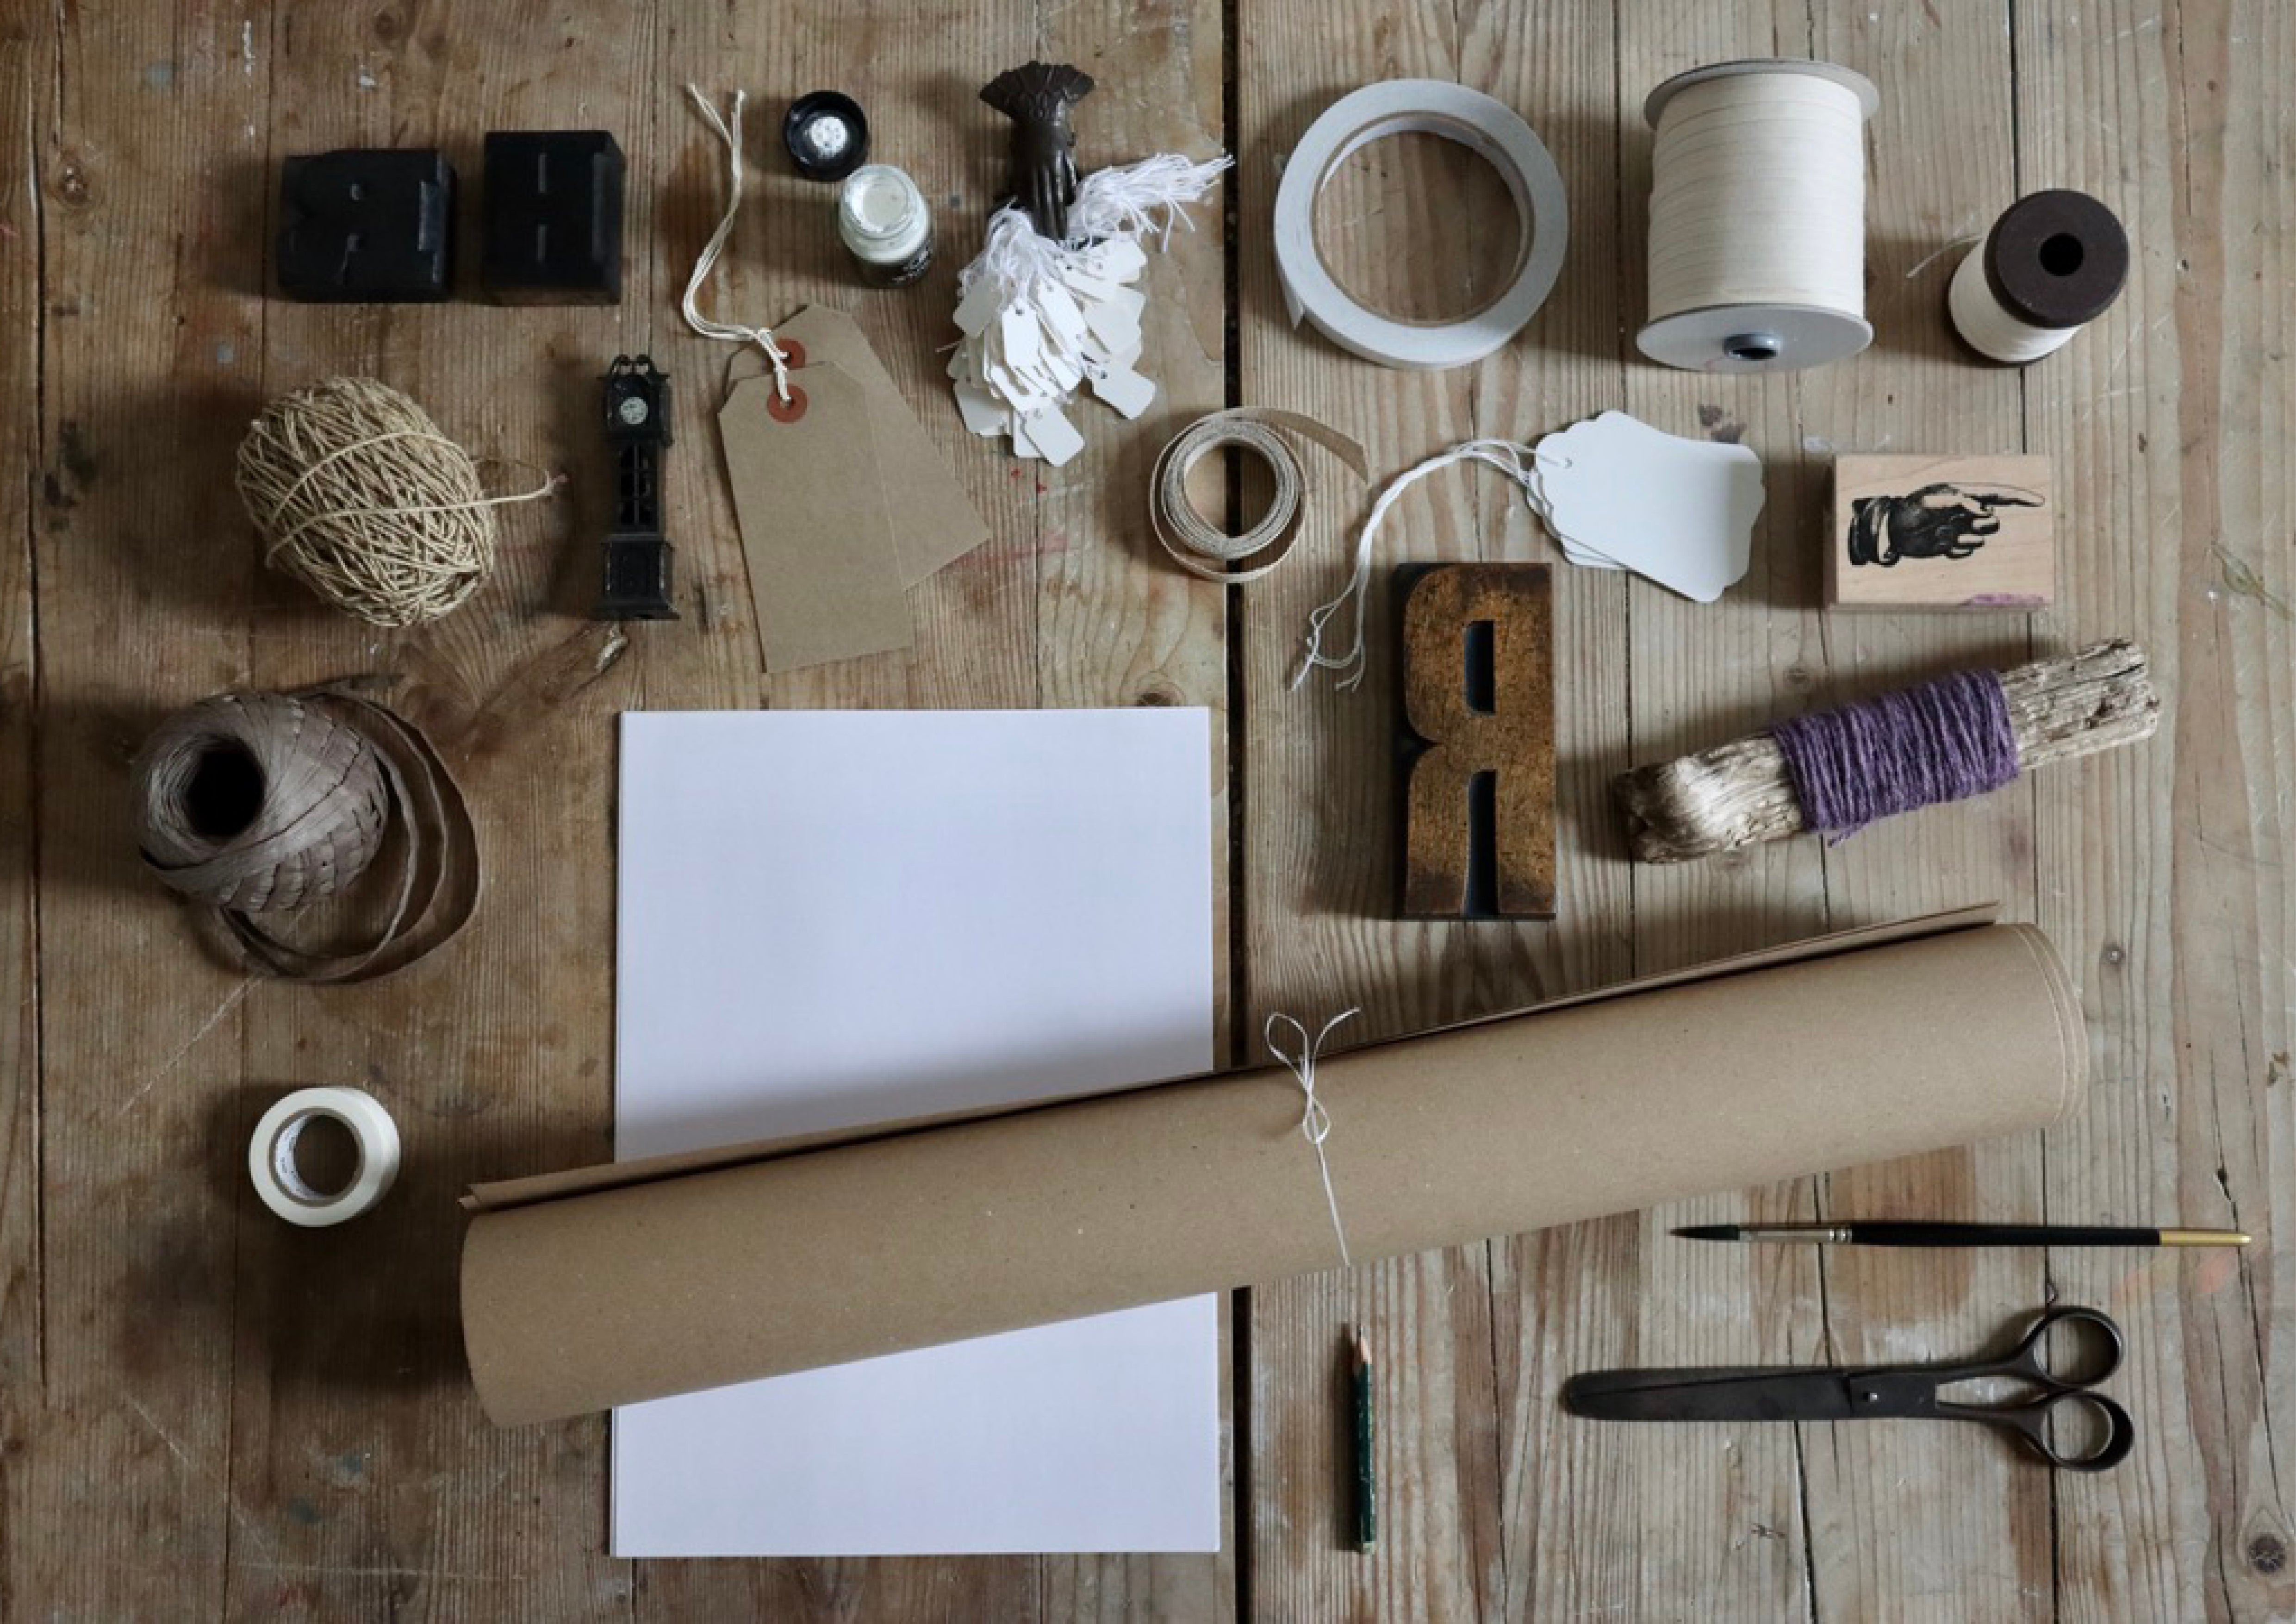
MATERIALS
Sheets of brown paper. You can cut pieces from a roll of kraft paper around 54cm x 75cm
Plain paper, for testing ideas and shapes
Spare kraft paper to see how your marks turn out
Ink (white ink contrasts warmly with brown, and paint will also work well)
Graphite pencil
Brush/pen/stick, or any mark-making instrument of your choice
Ribbon/twine/wool/raffia
Washi or parcel tape
Double-sided tape and cutting knife (optional)
Scissors


METHOD
Start by simply writing out the alphabet! Beginning at the top of the plain paper, write a row of joined up a's (lower case) in pencil. Continue down the page with each letter of the alphabet, noticing how abstract patterns are forming. Shake your hand out every once in a while our digital fingers are not used to this!
Make a note of which letters of the alphabet you're choosing to become whole sheets of wrap. This might be sparked by who might be receiving a parcel from you. Take their initials into account, and practice each of these individually, covering whole pages of plain paper with experiments in size and style. Keep these safe for later.

Once you're happy and confident with these try-outs, swap your pencil for ink and do the same on the sheets of brown kraft paper. You will notice how the different medium affects the flow and scale. Start at the top left of the paper, and steadily write across the page. Take your time, and dip into the ink as many times as you need. I like the variety of tones as the colour runs out. I usually begin with a', and work through the rest of my chosen letters.
Carefully move each sheet to a warm place to dry once you're done.
Now, bring your practice sheet of pencilled alphabet patterns back to the table. A few folds will transform it into a self-sealing envelope tag. Flip it over to the blank side, and add warm messages for the recipient. Fold the sheet in half widthways, with your words inside, and pattern on the outside.
Fold the bottom left corner up to meet the centre crease (as below image shows).


Then bring the top right corner down to the centre crease. Take the lower long cut edge to meet the cut edge above it, and do the same with the upper long cut edge, folding it down (as the following images below show).

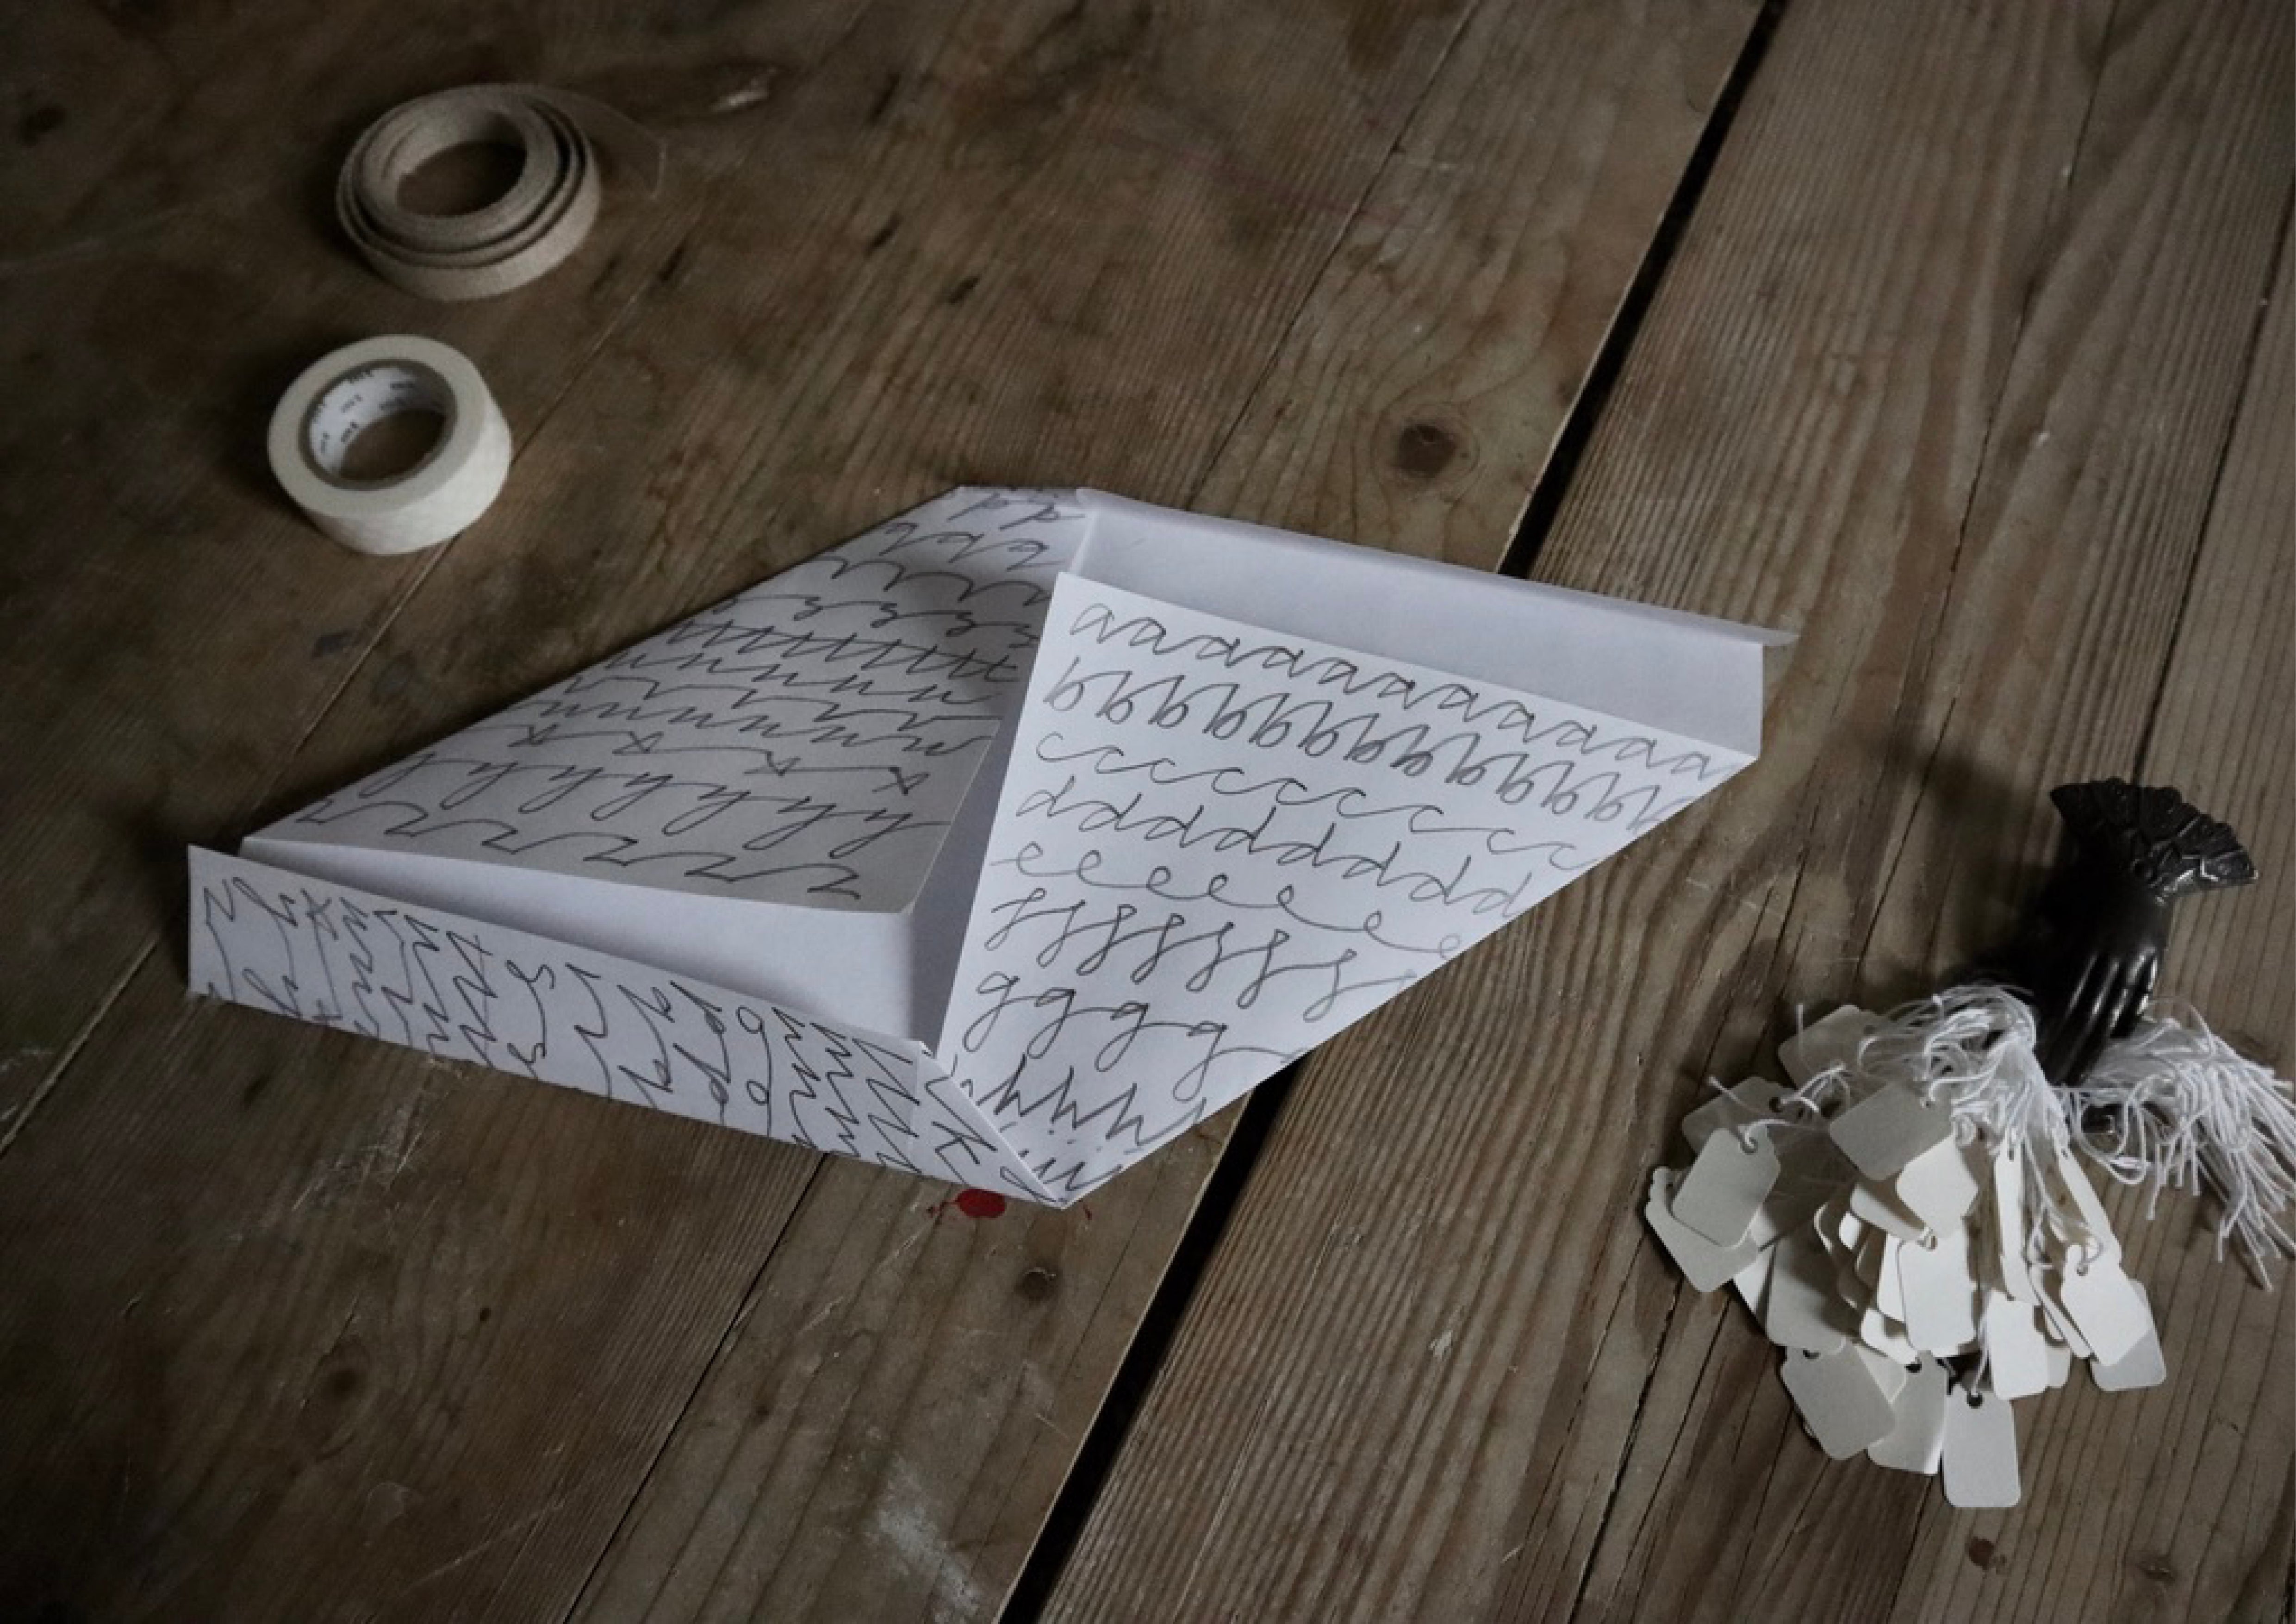
Finally take the triangle point on the bottom left up, to tuck under the top left triangle (as the following image below shows).
Repeat on the other side, bringing the top right triangle down to tuck under the triangle on the bottom right. I've cut one of the practice sheets in half and folded that into an envelope tag too.


You are now ready to assemble and wrap your parcel, using your paper twine, ribbon and tape.
First fold in the long sides and secure, then the shorter ends. Once the bow is tied, and the envelope tag is nestled under the ribbon, or stuck down with double-sided tape, the anticipation of gift-giving remains.
Images courtesy of Rachel Hazell. You can watch Rachel demonstrate the entire creative process on our IGTV.
We hope you enjoy this little guide on how to make sheets of your own bespoke wrapping paper. If you do make some, please share it on Instagram using the #TOASTtimetomake. We would love to see your creations.
Rachel's two week BookLove Love e-Course guides you to design, write and bind your stories. It starts on 25th January, and can be given as a gift. You can find more information here. Rachel's book Bound: 15 Beautiful Bookbinding Projects, published by Kyle, includes ideas to develop creating with paper and words.
Explore the TOAST Stationery Collection.


Add a comment