 London-based floral designer Paula Ellis of Fox & Thorn creates sculptural arrangements made from sustainably sourced materials; some foraged, some found.
Using hellebores and daffodil stems, seasonal bulbs from local growers and fresh moss from her local surroundings, Paula will demonstrate how to make a spring wreath to hang above your door this Easter.
Paula uses a simple bundle and binding technique, resulting in a wild and natural wreath that can be adorned with naturally dyed ribbon. Below, Paula talks through each step and gives some helpful tips on making fresh flowers last.
MATERIALS
Binding wire
Scissors or flower snips
A frame base (this could be a copper wire wreath frame, or a natural frame made with woven branches ie. willow, birch or vines)
Fresh moss
Seasonal flowers and branches (you could also opt to use dried flowers)
Ribbon to adorn
Fishing wire or string for hanging
 METHOD
Once you’ve sourced all of the above materials, find yourself a space where you can lay out your tools and materials. The process can get a little messy so you might want to work outdoors. If not, lay some newspaper on your surface.
Firstly, think about your base and the finished wreath shape you would like to create; decide whether you would like a full or partial wreath, wild and natural, or neat and delicate. The most simple base option would be a copper ring or a natural wreath, both of which you can buy online or in craft shops. If you are feeling creative you could choose to make your base out of willow, following a tutorial online. If you are using a copper double hoop, I like to give extra support by zig zagging binding wire around the hoops. The reason I do this is because it gives me more structure to build on, whether that’s adding moss or attaching stems or bunches directly. It’s also great when wiring on individual elements.
For my wreath today, I have chosen to repurpose a frame that was used in a TOAST Christmas window scheme a few years ago. If you have kept hold of your Christmas wreath you could even build on that - a positive way to reduce waste and upcycle what you already have. This one I am using is a half frame, which will create a semi-circular shaped wreath, as opposed to an entire circle. You can be creative with the final shape you want to achieve.
I’m using fresh moss for my wreath, which helps to hydrate the stems. Once the wreath is built, you can keep spritzing the moss with water to help keep the wreath really fresh. I collected my moss during my daily dog walks in the woods and it’s always satisfying when you find a big piece, like a carpet of moss! I lay individual pieces, overlapping onto the frame then gradually wrap over the top with the binding wire until I’ve covered the entire front of the frame. I only use moss when I’m using fresh stems bulbs. If you are using dried flowers and grasses, this is not necessary as there is no need to hydrate what has already dried out.
 The next step is attaching the flowers and foliage. The way I do this is by making small bunches in advance. I’ll then be able to play around much more freely with the placement and composition. To make the bunches I start with the branches and foliage. It is essentially like making a mini bouquet or buttonhole, and the branches create structure and support. I’ve chosen some wispy elements as I love to create a more wild and natural style, working with the natural shape of a stem. I’ve then added hellebores.
Having worked for several years with flowers, there are a few “conditioning” techniques I have learned which may be handy when making your bunches. Conditioning helps to get the best out of your fresh flowers and prevents them from wilting. For example, with the hellebores, I scolded the tips of the stems in boiling water for about 10 seconds when I cut them from my garden. I then placed them into cold water, which helps them to last longer. Snipping your flowers once they have just gone to seed is another good tip - this means your stems will be much more robust.
For my wreath I’ve selected the hellebores as the focal flower, and I’ve added some delicate double tulips and narcissi. As I’m building up the bunch in my hand, I’m placing stems in different directions, so as to create more movement in the arrangement. I then add a stem or two of catkin, as I personally love working with different textures.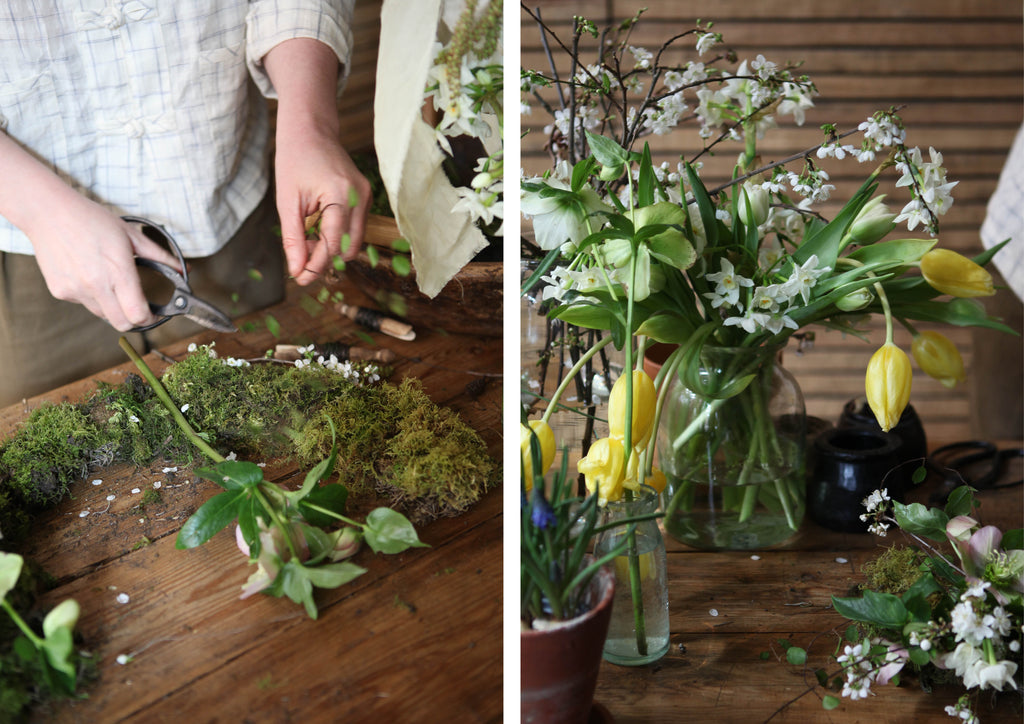
 Once I’m happy with the bunch, I want to secure it together. To do this I place binding wire under my thumb on the hand that’s holding the bunch, and then simply wrap around the stems a few times, and then twist. Snip the wire leaving a few centimetres each side and also snip the stems if they are long. I usually leave them 3 or 4cms from where you’ve wired them. When binding, be careful not to pull the wire too tight as this can damage the stems.
For the next step, I place the bunches on the frame, finessing my shape. Once I’m happy I then bind them on. Each time I’m attaching a bunch I layer an extra piece of moss to cover the stems, then wrap over the binding wire. Continue repeating this process.
I’ve chosen to create a section of my wreath with a pop of yellow tulips. This is also the point at which I changed direction in the flower placement. If I was making a full wreath, I’d possibly be placing bunches in the same direction all the way around.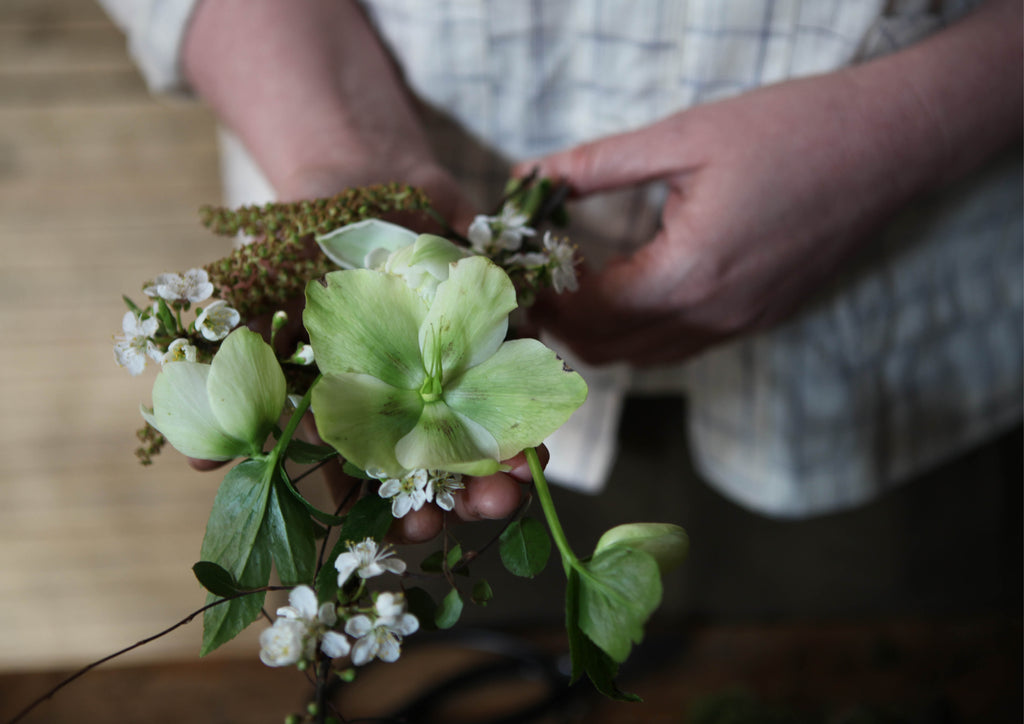
 Getting in the spirit of Easter I’ve decided to add some speckled quail eggs to my wreath. I made these beforehand by piercing the egg at the top and bottom, and then blowing out the yoke. I then poked some of the binging wire through the hole at the bottom, wiring them onto the wreath individually. I often add on little details individually to create dimension, such as flower heads and sometimes even fruits. Physalis, lychee and kumquats are perfect for this. For the finishing touch, I have chosen to add ribbon to my wreath. During lockdown I have been experimenting with natural dyeing, using really accessible ingredients such as onion skins, avocado and catkins. The ribbon I'm using here I dyed using carrot tops on a piece of silk. Alternatively, you can buy some lovely pieces online through makers like Natural Dye Works. You can also simply use any pieces of fabric you might have at home. I attached the ribbon to my wreath by threading under one of the binding wire loops.
Finally, attach some fishing wire, string or ribbon to your wreath and it’s ready to adorn your front door or window.  You can watch Paula demonstrate how to make a wreath on our IGTV Channel. Paula wears the Mul Mul Knot Front Shirt and the Felted Beret in Peat.


Add a comment
5 comments